DIY Cat Shelves: Maximize Playtime & Space, Even on a Budget
Does your feline friend constantly eye the highest bookshelf, the top of the fridge, or the precarious perch of your curtain rod? You're not alone! Cats are natural climbers, wired to seek out elevated vantage points where they can survey their domain, feel safe, and unleash their inner acrobat. This innate desire to climb makes creating vertical space not just a luxury but a necessity for their well-being and happiness. If you’re wondering how to build cat shelves that your cat will love, you've come to the right place. DIY cat shelves are a fantastic solution, offering a thrilling playground for your kitty while simultaneously freeing up valuable floor space often taken by bulky cat trees. Best of all, they can be surprisingly affordable, even if you’re on a tight budget!
Planning Your Feline's Vertical Playground
Before you dive into cutting wood and drilling holes, a little planning goes a long way. Consider your cat's personality – are they a fearless climber or a cautious observer? Think about the layout of your room and where shelves would best integrate without impeding human traffic. The goal is to create a seamless, engaging path that caters to your cat's natural instincts.
Essential Tools and Safety First
Regardless of the complexity of your chosen project, some tools are universally helpful:
- Screwdriver/Drill: Essential for fastening.
- Level: Crucial for ensuring your shelves are perfectly horizontal.
- Measuring Tape: For accurate cuts and spacing.
- Stud Finder: Non-negotiable for safety! Always attach shelves to wall studs when possible.
- Pencil: For marking drilling spots.
Safety is paramount. Your cat's shelves must be able to support their weight, plus the force of jumping and landing. This means investing in high-quality mounting hardware. Heavy-duty wall anchors rated to hold at least 50 pounds are a minimum requirement, even for smaller cats. If you can't hit a stud, toggle bolts or heavy-duty drywall anchors are your next best option. Never skimp on hardware; a falling shelf could injure your cat or damage your home.
Choosing the Right Materials on a Budget
You don't need exotic materials to build amazing cat shelves. Many options are budget-friendly and readily available:
- Wood: Pine boards (new or reclaimed), MDF, plywood. Look for sales or scrap wood sections at hardware stores.
- Carpet Remnants: The unsung hero of DIY cat shelves! Carpet squares provide crucial traction, protect surfaces, and offer a cozy spot for naps. You can often find decent-sized remnants for $4-$10 at carpet stores. Recycled indoor/outdoor carpet is also a durable choice.
- Sisal Rope: Perfect for scratching posts and adding climbing texture. Buy in bulk for better value.
- IKEA Hacks: Repurposing affordable furniture items like IKEA Lack shelves can save you significant time and money on woodworking.
- Hardware: L-brackets, screws, wall anchors. Always choose sturdy, appropriately sized options.
Step-by-Step DIY Cat Shelf Projects for Every Skill Level
Let's explore several inspiring ideas for how to build cat shelves that your cat will love, ranging from super simple to more involved projects.
The Beginner-Friendly Basic Shelf
This is the perfect starting point for anyone new to DIY. You'll need:
- Shelves of varying sizes (e.g., 18-inch and 24-inch wide shelves work well).
- Sturdy mounting hardware (brackets and heavy-duty wall anchors).
- Screwdriver, level.
- Carpet squares.
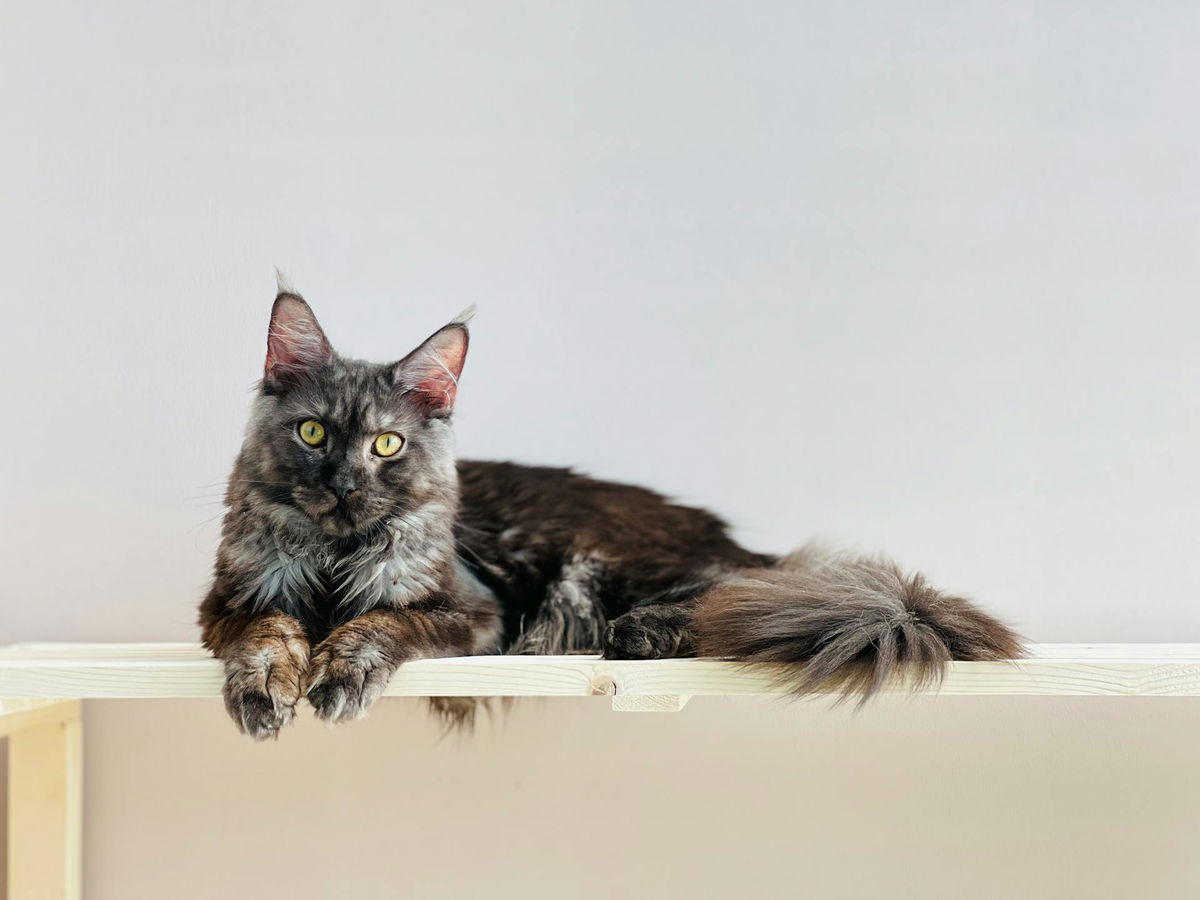
Process: Measure and mark your desired shelf positions, ensuring they are level and spaced appropriately for your cat to jump comfortably between them. Use your stud finder to locate studs for maximum stability. Secure the mounting hardware to the wall, then attach the shelves. Finally, cover the shelf surfaces with carpet squares. You can attach them using spray adhesive or by stapling them to the underside. This adds essential grip for climbing and a soft surface for lounging, while also introducing color to blend with your decor. Remember to test the sturdiness of each shelf before letting your cat explore!
For more basic ideas, check out Build Easy DIY Cat Shelves: A Beginner's Guide for Happy Felines.
Adding Style with a Custom Mural Corner
Elevate the basic shelf concept by dedicating a whole corner to your cat, complete with a personalized mural!
- Wooden board (at least 1/2 inch thick, 12 inches deep, 18 inches wide recommended).
- Sturdy "L" brackets (side lengths at least half the board's depth).
- Heavy-duty wall anchors (into studs are best).
- Wood screws.
- Fabric (for covering) and spray adhesive.
- Paints and brushes for your mural.
Process: Cut and sand your wooden board(s) to size. Decide on your mural design and paint it directly onto the wall behind where the shelves will go. Once the paint is dry, attach the "L" brackets to the wall using heavy-duty anchors, ensuring they are securely fastened to studs. Then, use wood screws to attach the wooden boards to the brackets. Cover the board surfaces with your chosen fabric using spray adhesive, making sure it's taut and smooth. If building multiple boards, plan the spacing carefully to allow your cat safe and easy access between levels. This approach gives your cat a designated, beautifully designed space that integrates seamlessly with your home decor.
Creating an Adventurous Climbing Wall
For the truly athletic feline, a climbing wall with sisal steps can be incredibly rewarding. Inspired by components like IKEA Ekby Valter shelf carriers, this project focuses on creating dynamic climbing elements.
- Shelf carriers (e.g., untreated wood carriers).
- Solid wood panels (oak, spruce, or MDF).
- White primer and paint (to match interior).
- 8mm thick sisal rope.
- Spruce wood for steps (e.g., 7x4 cm, 26 cm deep for main step; 9.5x9.5 cm for back, 9.5x6 cm for front).
- Screws, nails.
Process: Cut your wood panels to desired shelf lengths and widths. Treat them with primer and paint for durability and aesthetics. For the sisal steps, cut spruce wood pieces to form small platforms. Wrap sisal rope tightly around the front piece of each step, securing it firmly with a nail on the underside to prevent unwinding. Mount the larger back steps to the wall with screws, then attach the sisal-wrapped front steps. Integrate these sisal steps with wooden shelves, using the shelf carriers, to create a challenging and engaging climbing route. Alternatively, you can cover your wooden shelves with recycled carpets for traction and a cozy feel. This project allows for extensive customization in design and style, making it truly unique to your space.
Incorporating a Built-In Scratching Post
Why build just a shelf when you can integrate a scratching post directly into your cat's elevated domain? This rustic-looking project is highly functional.
- Two 1" x 12" x 8' pine boards (knots add aesthetic appeal).
- One 6" x 6" x 8' post.
- 100 feet of 3/8" natural sisal rope.
- Roll of indoor/outdoor recycled carpet.
- 24 black steel L-corner brace brackets.
Process: Sand your pine boards smooth. Measure and cut them into shelves of various lengths to create a dynamic layout. Consider staining the wood for a desired aesthetic. In one of the shelves, cut a hole large enough for your cat to comfortably pass through, offering an alternative route. Using the L-corner brace brackets, attach the shelves to the wall, ensuring suitable spacing for cat mobility. The 6"x6" post serves as the main scratching element; wrap it tightly with sisal rope, leaving some parts of the wood exposed for visual interest. Secure the post firmly to the floor and/or a wall stud, ensuring it's stable enough to withstand vigorous scratching. Cover appropriate shelf surfaces with recycled carpet for added traction and comfort. This design addresses both climbing and scratching needs in one cohesive unit, making it a truly comprehensive solution for how to build cat shelves that your cat will love.
The IKEA Hack: Zero Woodworking, Maximum Impact
If woodworking isn't your forte, or you're short on time, repurposing IKEA Lack shelves is a brilliant, budget-friendly option.
- IKEA Lack shelves (or similar floating shelves).
- Carpet remnants or squares.
- Strong spray adhesive.
- Drill, level, wall anchors.
Process: Purchase IKEA Lack shelves; their simple design and hidden mounting hardware make them ideal. Before mounting, cover the top surfaces of the shelves with carpeting. Cut the carpet to size, apply a strong spray adhesive to the shelf, and carefully press the carpet onto the surface, ensuring there are no bubbles or wrinkles. Allow the adhesive to dry completely. Then, follow IKEA's instructions to mount the shelves securely to your wall, making sure to use appropriate wall anchors for your wall type (drywall, plaster, etc.) and checking for studs if possible. This method creates functional, attractive cat shelves with minimal effort, transforming basic furniture into a feline-friendly feature. You can combine various sizes and heights to build a full cat highway.
Maximizing Fun and Functionality
Beyond the build, how you arrange and maintain your cat shelves can significantly impact your cat's enjoyment.
Design Tips for Cat Happiness
- Varying Heights: Create different levels for jumping, exploring, and surveying.
- Strategic Placement: Position shelves near windows for bird watching, or above furniture to create a new "path" around the room.
- Escape Routes: Ensure there are multiple ways for your cat to get up and down, reducing the chance of them feeling trapped.
- Resting Spots: Include at least one wider shelf or a bed-like platform for napping.
- Add Enrichment: Place toys, treats, or catnip on shelves to encourage exploration. Consider hanging toys from the underside of shelves for extra fun.
- Consider Your Cat's Agility: Younger, more agile cats might enjoy wider jumps and more complex routes, while older or less nimble cats will benefit from closer spacing and ramps.
For more inspiration on transforming your walls into a cat paradise, check out Transform Your Walls: Creative Cat Shelf Ideas for Every Style.
Maintenance and Longevity
To ensure your cat shelves remain a safe and enjoyable space, regular maintenance is key:
- Check for Looseness: Periodically inspect all screws, brackets, and wall anchors to ensure they are still tight and secure.
- Clean Regularly: Vacuum or wipe down shelves to remove cat hair, dust, and dander. If you've used carpet, spot clean as needed.
- Inspect for Wear and Tear: Look for frayed sisal rope, worn carpet, or splintering wood, and repair or replace as necessary.
- Monitor Your Cat: Pay attention to how your cat uses the shelves. If they seem hesitant or struggle with certain jumps, consider adding intermediate steps or adjusting spacing.
Building DIY cat shelves is more than just a home improvement project; it's an investment in your cat's physical and mental well-being. By providing vertical territory, you tap into their natural instincts, reduce stress, and offer endless opportunities for play, exercise, and secure napping. With a little planning, some basic tools, and these inspiring ideas, you can easily discover how to build cat shelves that your cat will love, transforming your home into a feline wonderland without breaking the bank. Happy building!
